First Indoor Grow
Step by step breakdown
by The Grow Haven
Welcome, future green thumb! Taking the leap into your first indoor cannabis grow is an exciting journey. It might seem like there’s a lot to learn, but we’re here to break it down for you. At The Grow Haven, we believe that with a little guidance and the right setup, anyone can achieve amazing results right at home. This step-by-step guide will walk you through everything you need to start your first indoor grow, focusing on simple, sustainable, and budget-friendly methods.
Indoor grow success starts with the right setup. Simple steps, big results. From seed to harvest, we’ve got you covered.
Step 1: Choose Your Grow Space

The first decision is where your plants will live. You don’t need a huge area, just a space you can completely control.
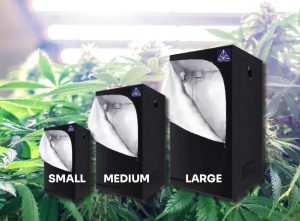
- Grow Tent: This is the most popular option for beginners and for good reason. Tents are affordable, light-proof, and have built-in ports for ventilation, making setup a breeze. A 2’x4′ or 4’x4′ tent is a fantastic starting point.
- Closet or Spare Room: If you’re on a tight budget, a spare closet can work wonders. The key is to make it light-proof. Any light leaks during the dark cycle can stress your plants. You’ll also need to ensure you can manage ventilation in the space.
Step 2: Select Your Lighting
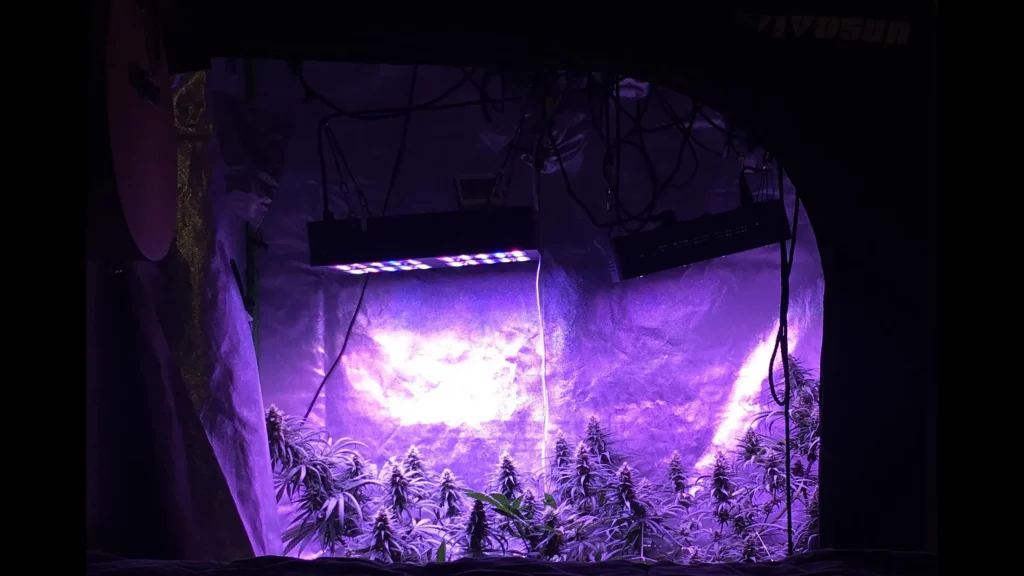
Light is your plant’s food. The quality and intensity of your light will directly impact your final harvest. While there are many options, we recommend starting with one that is energy-efficient and easy to manage.
- LED (Light Emitting Diode): This is our top recommendation for beginners. Modern full-spectrum LEDs run cool, use less electricity than older technologies, and last for years. The initial cost is a bit higher, but they save you money in the long run on your energy bill and by reducing the need for extra cooling.
- CFL (Compact Fluorescent Light): A good ultra-low-budget choice for one or two small plants, but they lack the power for dense flower production.
A quality LED light is a solid investment that will serve you well for many grows to come.
Step 3: Manage Your Environment
Cannabis plants thrive in specific conditions. Creating the right environment means controlling air, temperature, and humidity.
- Ventilation: Your plants need fresh air (rich in CO2) to breathe. An inline fan connected to ducting will exhaust hot, stale air out of your tent, while pulling fresh air in through a bottom vent.
- Air Circulation: An small, oscillating clip-on fan inside your space is essential. It keeps air moving to prevent hot spots and moisture buildup, and the gentle breeze strengthens your plant’s stems.
- Odor Control: To keep your grow discreet, a carbon filter is non-negotiable. It attaches to your exhaust fan and scrubs odors from the air before it leaves your grow space.
- Monitoring: A simple thermo-hygrometer will allow you to monitor temperature and humidity. Aim for 70-85°F (21-29°C) and 40-60% humidity during the vegetative stage.
Step 4: Pick Your Growing Medium
This is what your plant’s roots will grow in. While there are advanced hydroponic methods, we recommend starting with soil. It’s forgiving and feels the most natural.
- Bagged Organic Soil: The simplest path. Start with a high-quality organic potting mix designed for cannabis. These often contain enough nutrients to get your seedling started.
- Living Soil / No-Till: This is a fantastic, sustainable method we love. Instead of using bottled nutrients, you build a rich ecosystem of beneficial microbes, fungi, and worms right in your pot. This “soil food web” breaks down organic matter and feeds your plant naturally. It’s a low-cost, low-effort way to grow amazing plants once established. You can even start your own worm compost bin to create this incredible resource yourself.
Step 5: Choose Your Genetics
Your plant’s potential is locked into its genetics. You can start from seeds or clones.
- Seeds: We recommend beginners start with feminized or autoflowering seeds. Feminized seeds guarantee you’ll get a flower-producing female plant. Autoflowers are even simpler—they don’t rely on a light schedule to start flowering, making them very beginner-friendly.
- Clones: A clone is a cutting from a “mother plant” and is genetically identical. This is a great way to guarantee a female plant with known characteristics, but they can be more delicate for a first-timer.
Step 6: Nutrients and Water
If you’re using a basic potting mix, you’ll need to feed your plants. If you’ve built a rich living soil, you may only need to add water.
- Nutrients: Plant nutrients are based on N-P-K (Nitrogen, Phosphorus, Potassium). Plants need more Nitrogen (N) during vegetative growth and more Phosphorus (P) and Potassium (K) during flowering. Start with a simple, two-part organic nutrient line to keep things easy.
- Water: Always use dechlorinated water. The easiest way to do this is to let your tap water sit out for 24 hours. It’s also a good idea to invest in a simple pH testing kit. Cannabis in soil prefers a water pH between 6.0 and 7.0.
Ready, Set, Grow!
With your space, lights, and environment set up, you are ready to plant your first seed. As you gain experience, you can explore techniques like the Sea of Green (SOG) or Screen of Green (SCROG) to maximize your yields, but for now, focus on mastering these basics.
The most important part of this journey is to have fun, observe your plants, and learn as you go. Don’t be afraid to ask questions!
Ready to build your shopping list? Download your free Beginner’s Grow Setup Checklist to make sure you have everything you need to get started.
Start your grow journey today! We can’t wait to see your progress.


